There are loads of blogs and videos that all go on about what exposure settings you should use to expose for a log profile on your camera and how you can get the most out of shooting in log. What there seems to be though, is a complete lack of a practical guide on how to actually do it.
A lot of theory and technobabble is involved and a lot about how to expose of middle grey and getting the noise out of the shadows.
So here is my comprehensive guide (with very little technobabble) and when and why you should shoot in Log and how to use it for your videos.
What is Log Profile?
In layman’s terms, a log profile is a flat picture profile for your camera which allows you to capture more of the dynamic range that your camera can see. We use a log image when we have a heavily contrasty image, such as filming outside in direct sunlight.
The profile has no contrast, very little sharpness and desaturated colours. The idea is that we colour correct the footage to return all of these later on in an editing programme like Premiere Pro or Final Cut Pro X.
Examples
As an example below is a shot filmed in a Standard profile and one in a Log profile.
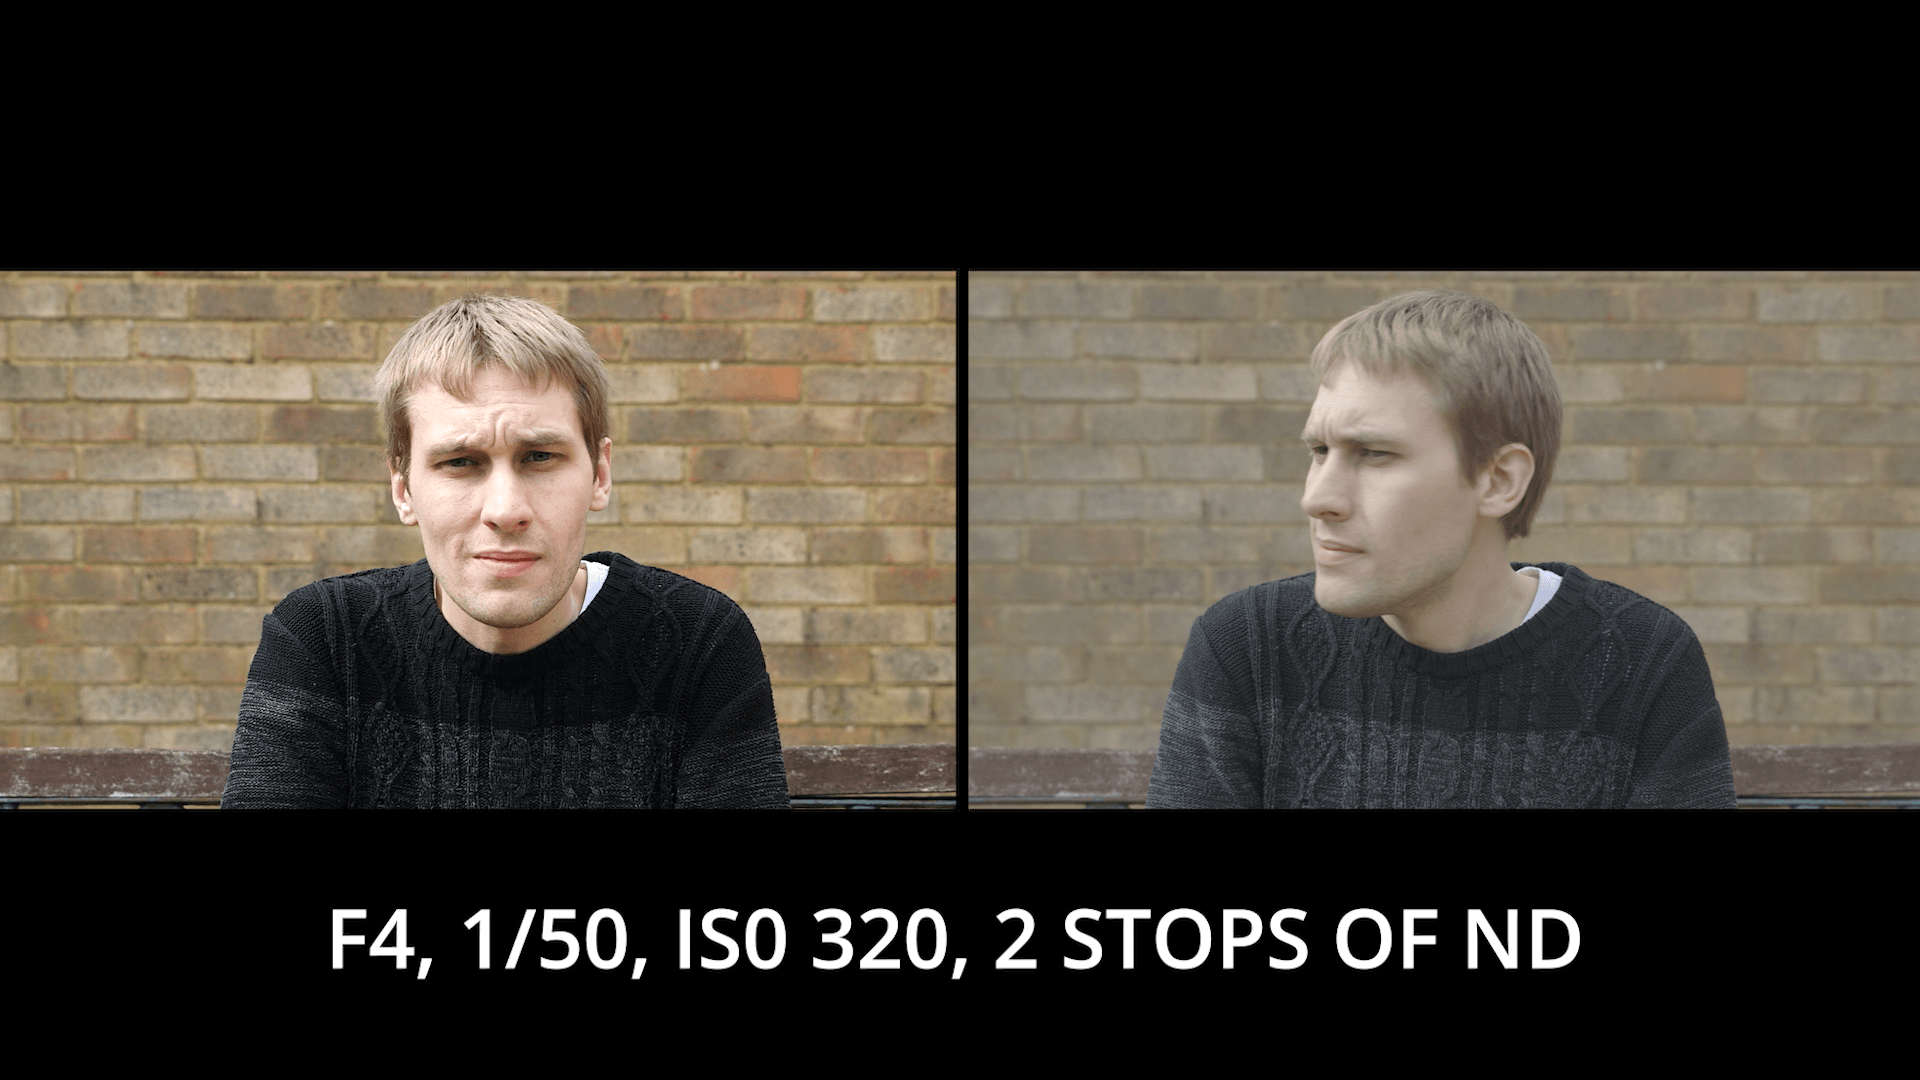
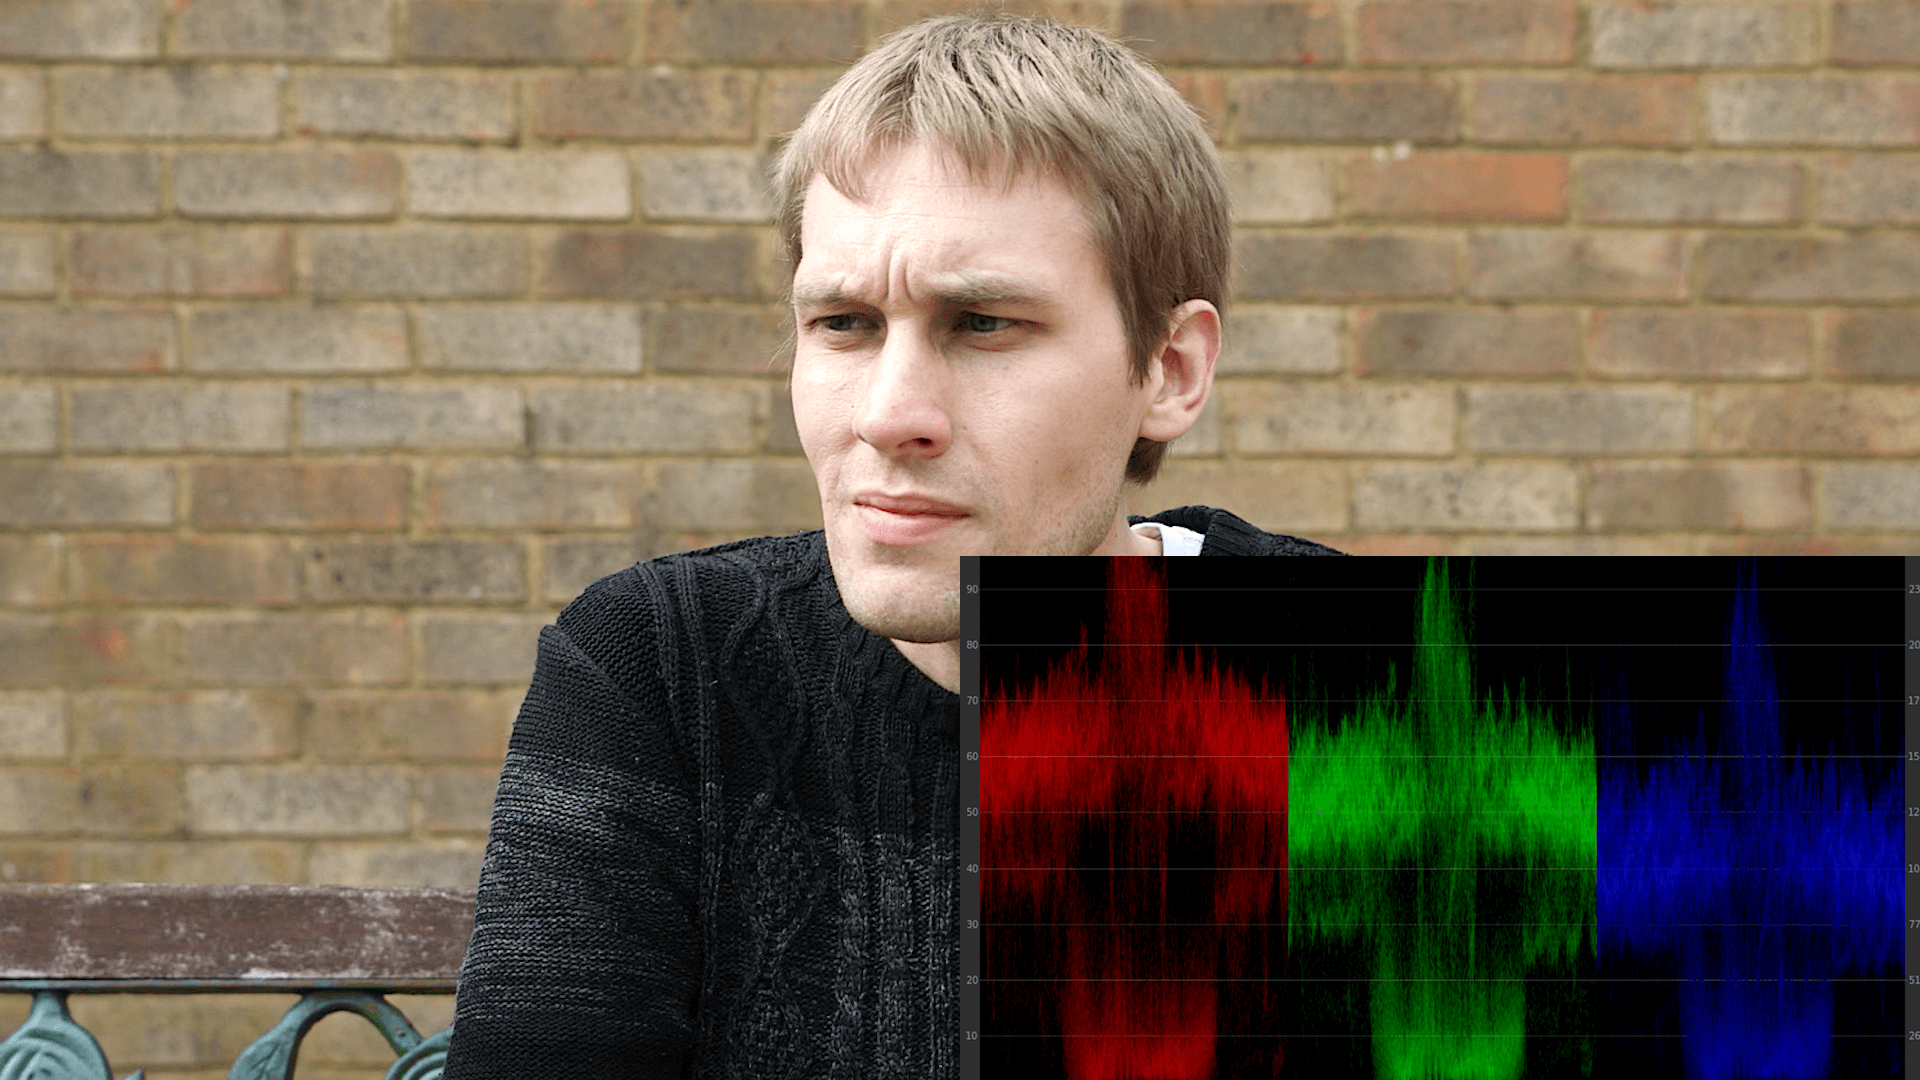
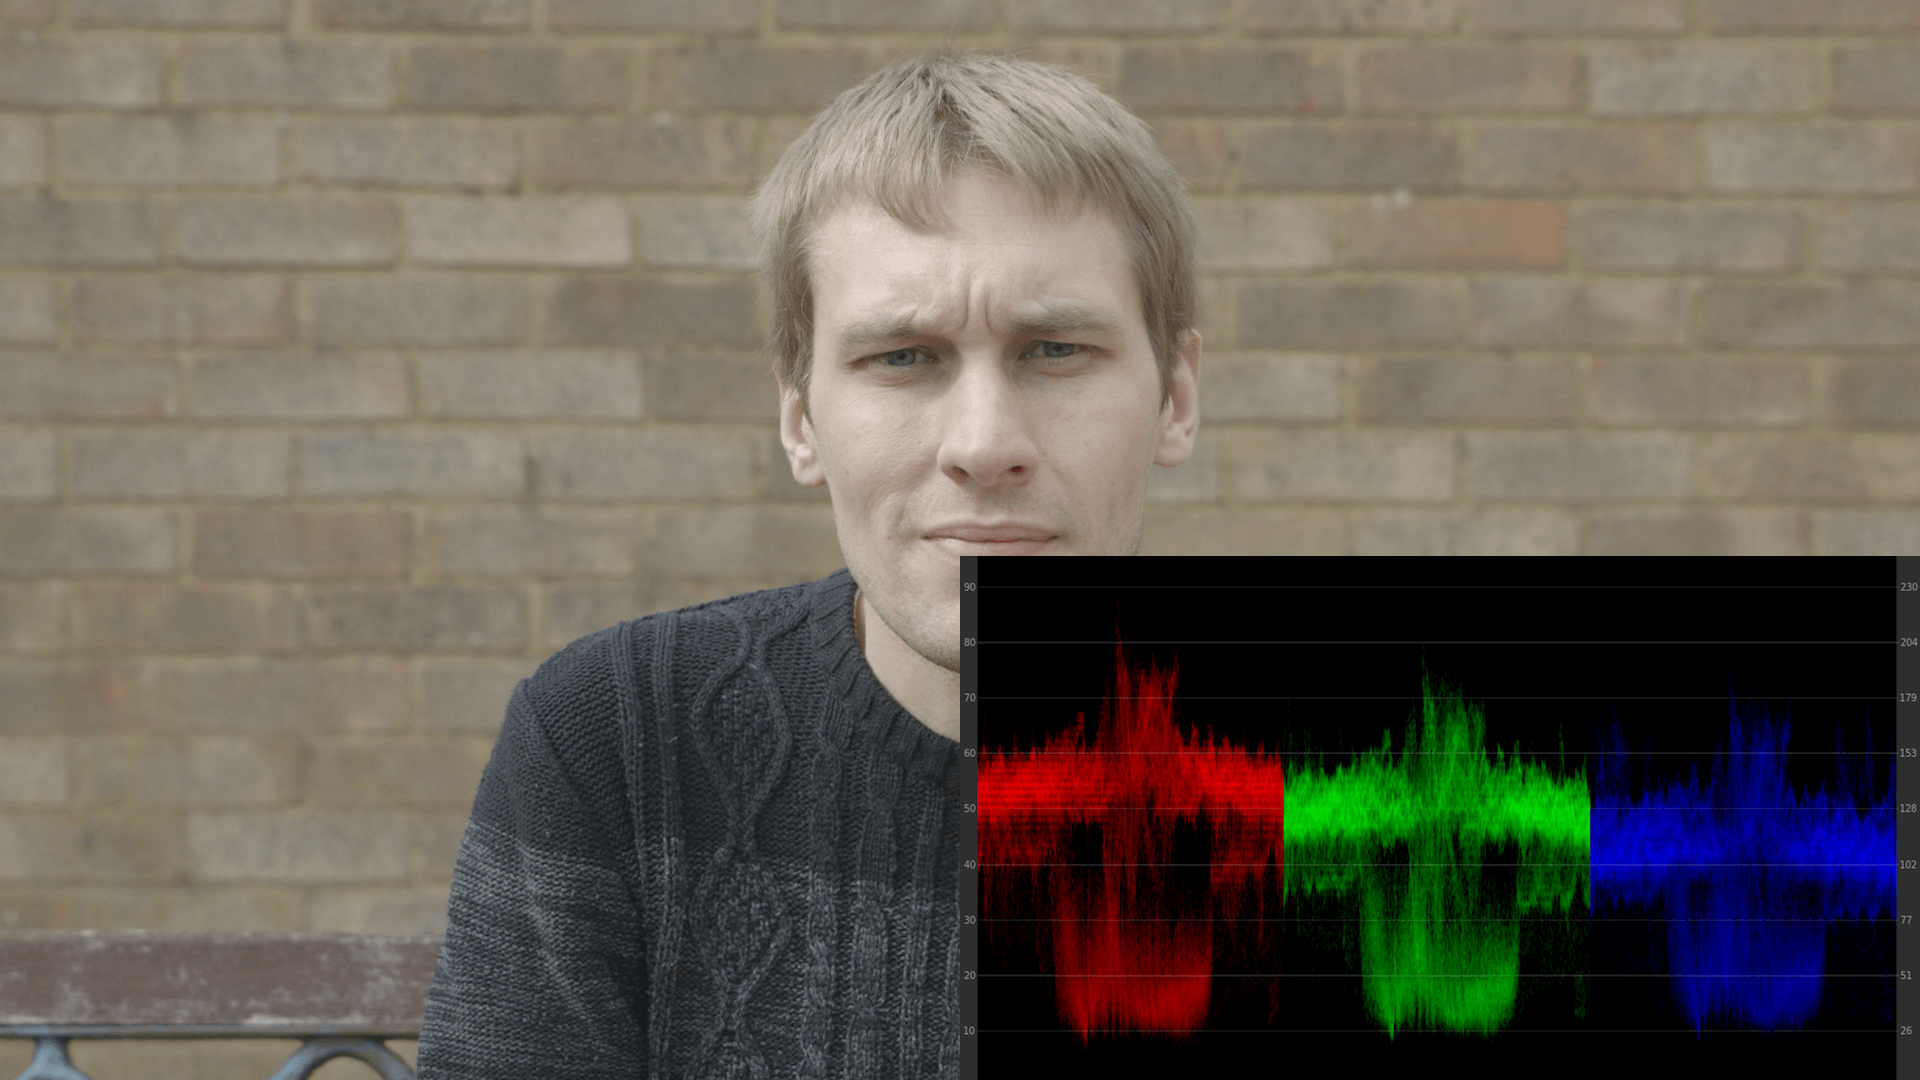
To see what’s going on with how these images are exposed let’s have a look at the waveforms. Waveforms provide the most accurate way to see what’s going on with exposure. At the top of the waveform you have your highlights and at the bottom are your shadows. In the middle, these are called the mid-tones.
On the Standard profile, you can see that the waveform is filled out.
With a log image, we need to expose it two stops brighter than the standard profile. This is because the image is being crushed into the centre with the idea that we can pull all of this information back out in the editing suite. By exposing to the right we can pull the shadows back down later on giving you a cleaner image with less noise.
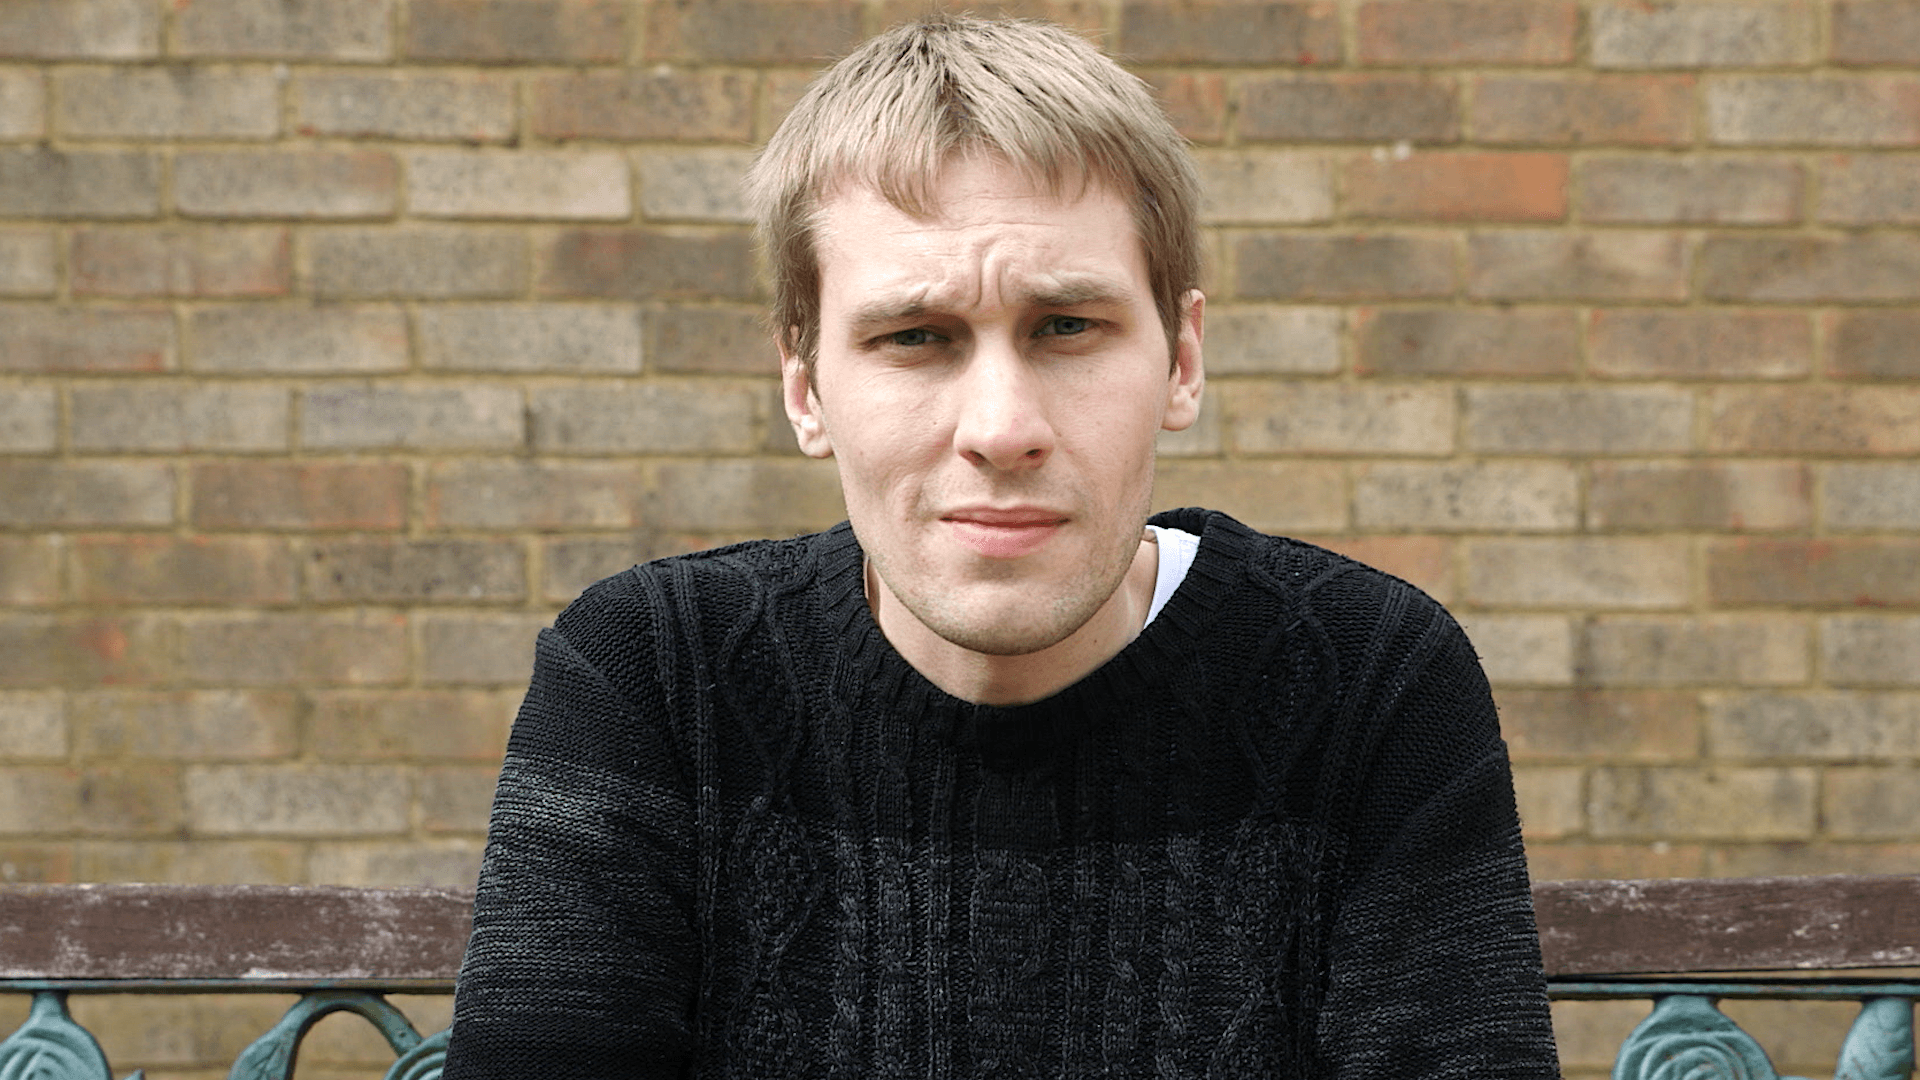
Graded Standard
Graded Log
When Not to Use a Log Profile
A mistake that a lot of filmmakers make when they get a camera with a log profile, such as a Canon C100 or a Sony A7SII, is that they shoot in a log profile in all situations – and I was exactly the same.
The truth is that you don’t need to shoot in a log profile in every scenario or location that you go to.
In a fixed lighting situation such as an interview, or a green screen studio or where you have complete control of the lighting, there really isn’t the need to film in a log profile. As you have don’t have the requirement or tricky lighting situations, you are much better off in shooting in a standard profile or a natural profile to save yourself a lot of colour correcting down the line.
Another time you don’t want to use a log profile is when you are shooting in low light. Earlier I talked about exposing a log image 2 stops brighter than an image filmed in a standard profile. In a low light situation, when you can’t open the aperture up anymore or lower the shutter speed, then you’ll likely be raising your ISO. The higher you raise the ISO, the more digital noise you introduce into the image.
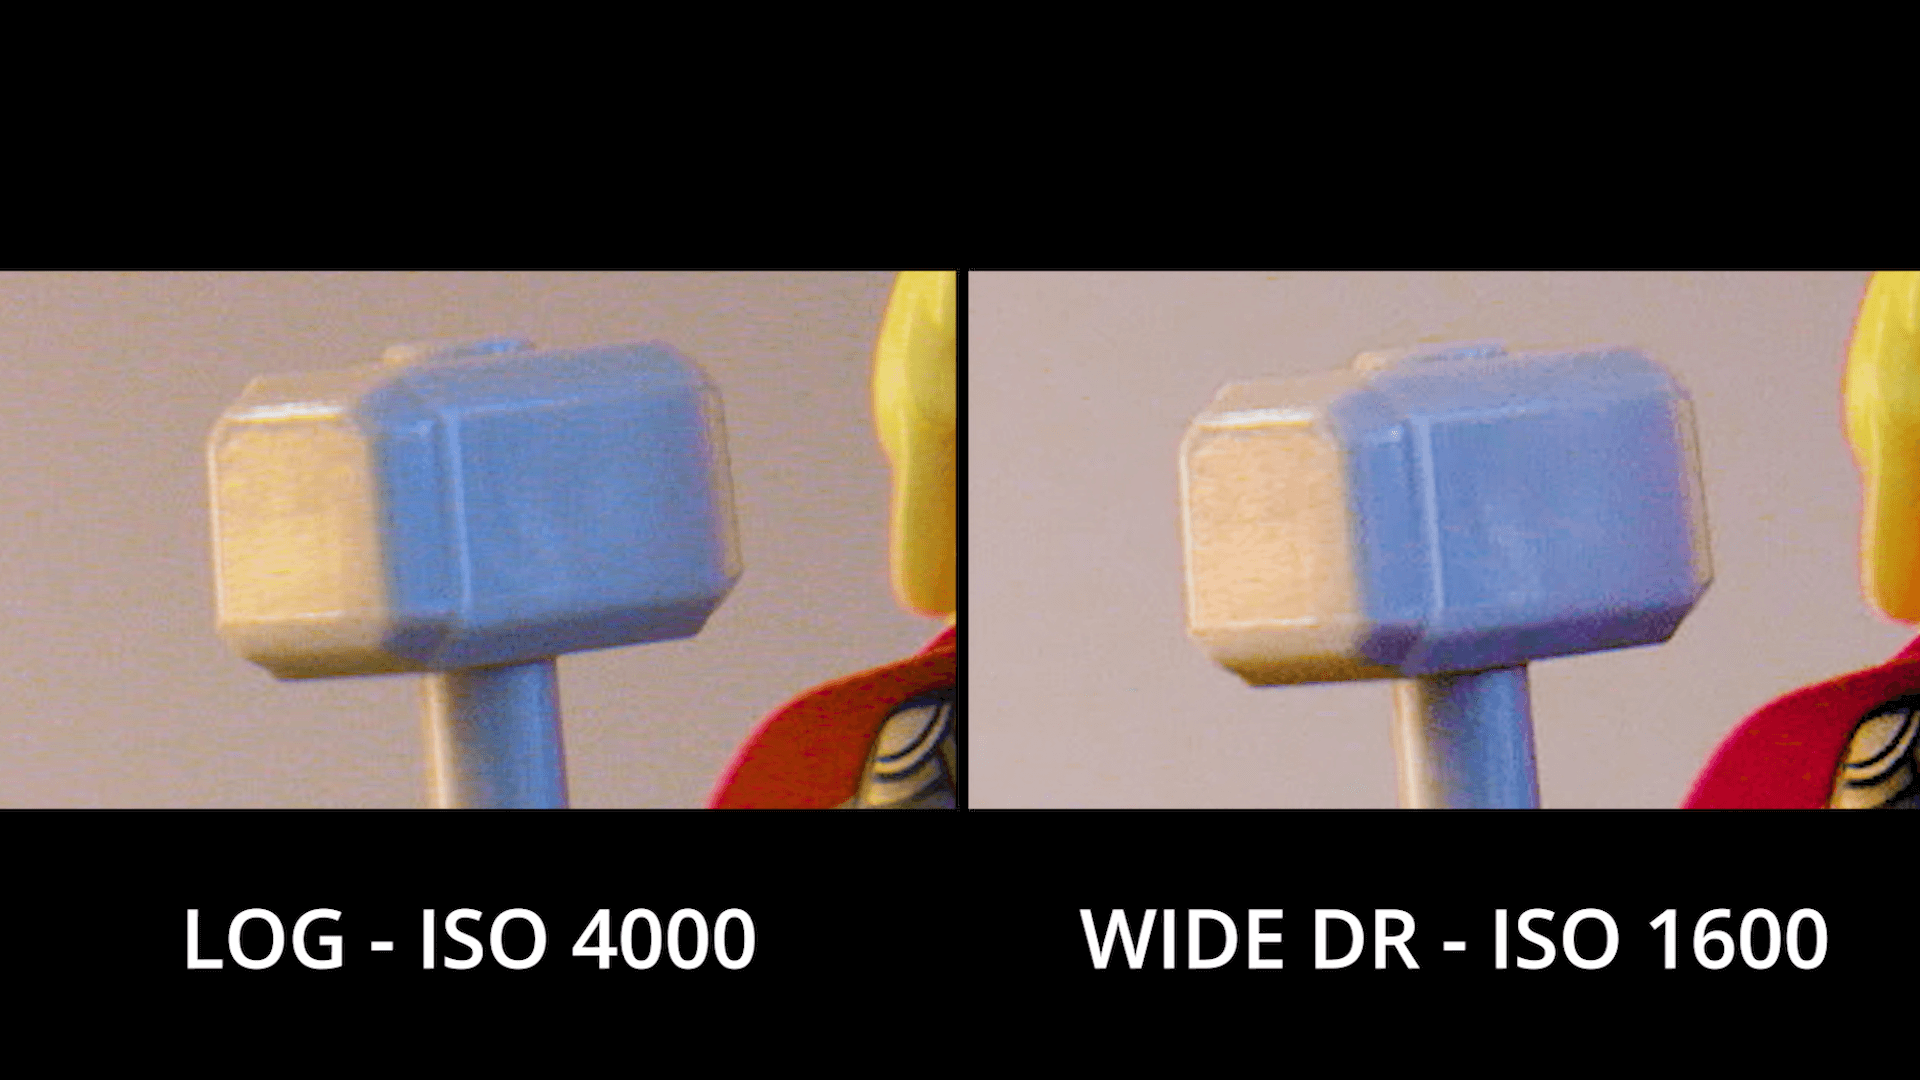
If you are going to shoot in a low light situation, you are better off shooting in a Natural profile or a Standard profile so that you can reduce your ISO if you can’t bring any lights into a location.
Bit Rate
Filming in a log profile has a lot of benefits in terms of being able to use the majority of the dynamic range of the camera. A lot of log profiles though are being shipped with cameras which have either a low bit rate or operate in the 4:2:0 colour.
For more information on understanding colour space, watch this video.
My main camera is the Canon C100 which has an 8 Bit 4:2:0 colour space. Shooting in a log profile with the internal codec of the camera means that I have less colour information to use when I try to colour correct the image back to look like a Standard profile or a Rec709 profile.
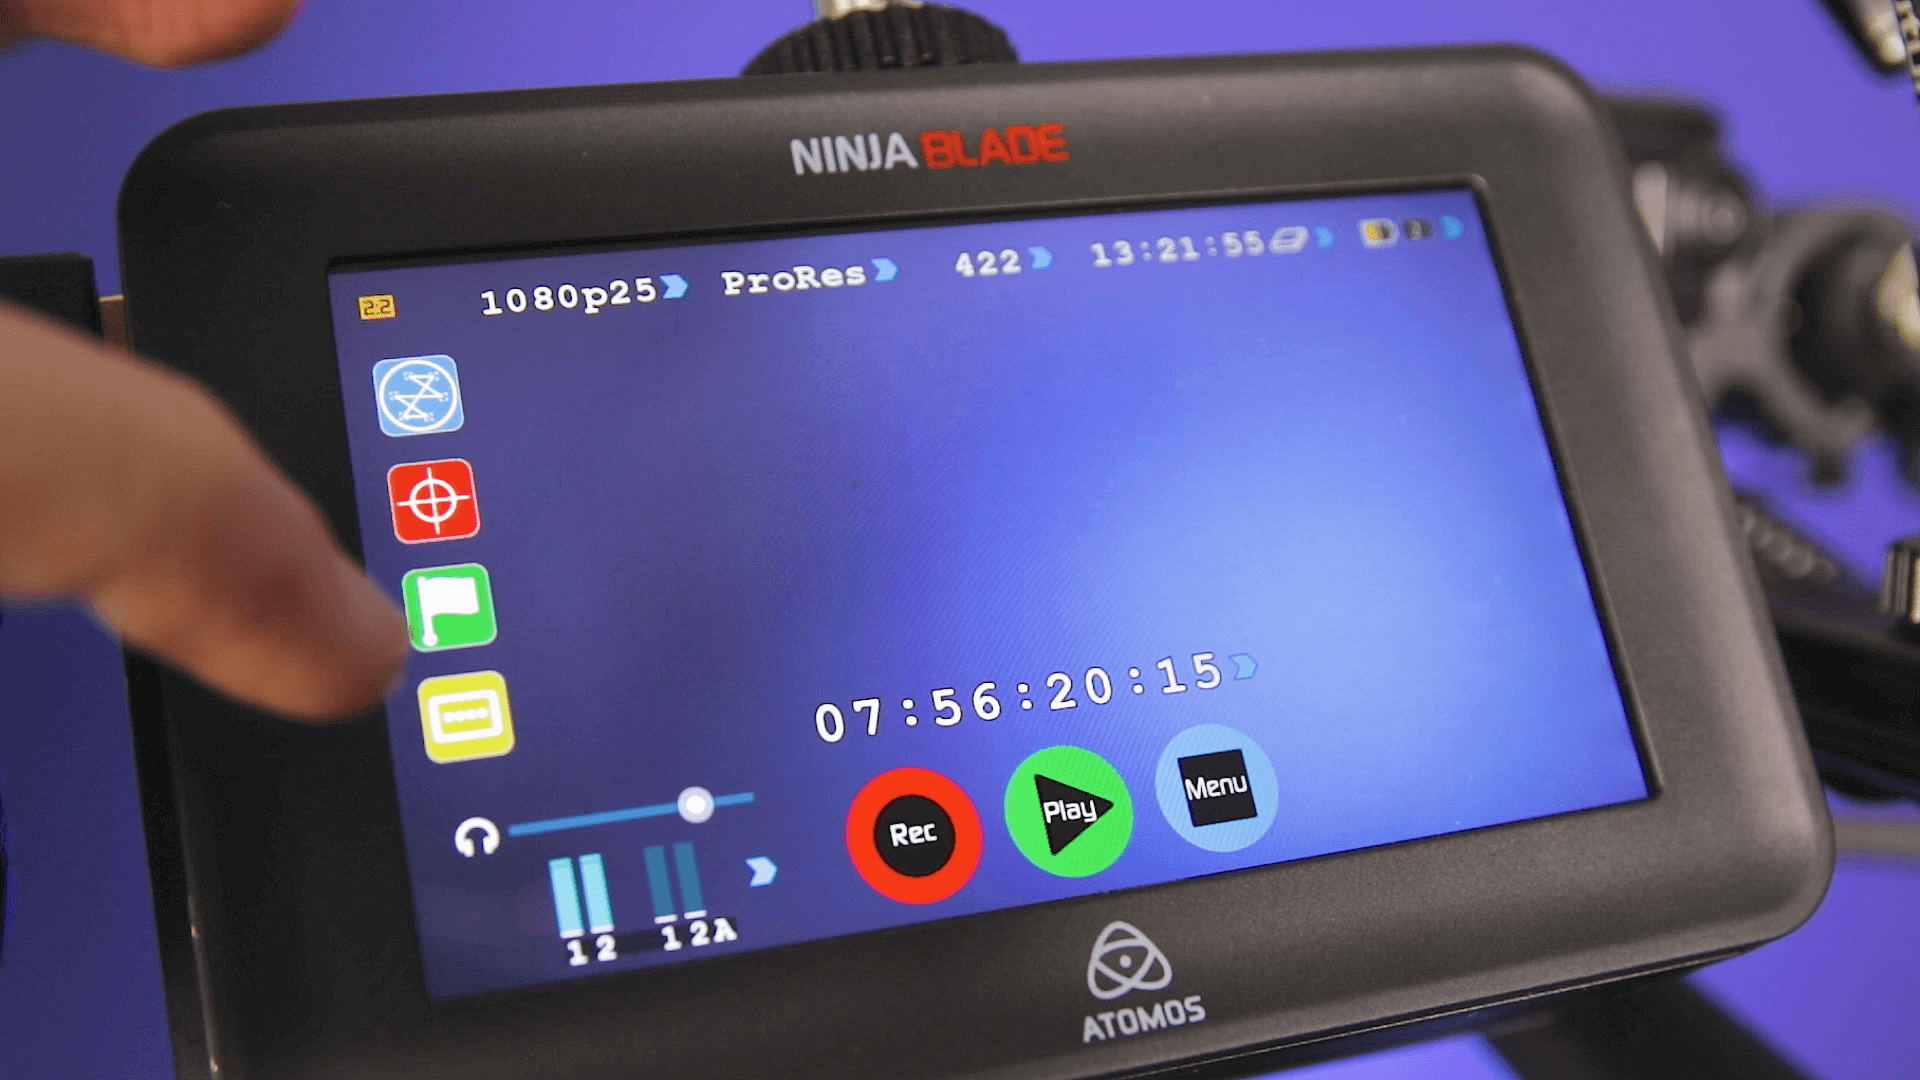
If you do have a camera like this (all the Sony A7 cameras have an 8 bit 4:2:0 codec) then either you can film in a natural profile or you can use an external recorder from Atomos or Blackmagic which takes a signal via HDMI or SDI to record to a higher codec, usually an 8 bit 422 or 10 bit 422 codec.
I use an Atomos Ninja Blade to record to ProRes 422 and this gives me a more robust codec to edit footage filmed with a log profile.
Conclusion
I really enjoy shooting with a log profile, especially on my Canon C100 with the combination of the Atomos Ninja Blade. The log profile really helps me out in difficult lighting situations or if I’m dealing with mixed lighting.
There are lots of ways to correct a log image when you get it back into your editing suite so in a future blog I’m going to break down my process of how I colour correct a log image and how easy it is to do when you understand the limitations of your camera, the codec and the lighting situation you find yourself in.